Leave The IT Dirty Work To Us And Focus Back On What's Important, Running Your Business To Maximum Potential

Contact
Fill in the form below to get started.
eSOZO Computer and Network Services keeps your business information secured. We will NEVER sell or rent your personal information to anyone.
Half the fun of the holiday season is putting up decorations, whether it’s at home, or at the office. The snowflake has long been a staple of festive holiday décor. It also happens to be one of the easiest and most inexpensive decorations to make yourself. All you need is a pair of scissors, and a few sheets of paper.
While you can absolutely pick up fancy paper for this project, plain old copier paper works wonderfully. It’s snowflake-colored, and easy to work with. The following steps will help you to create beautiful six-pointed paper snowflakes.
- Make A Square – You’ll need to start by making your rectangular piece of paper into a square. Simple fold one side of the paper into a precise isosceles triangle, and trim off the excess strip to create your square.
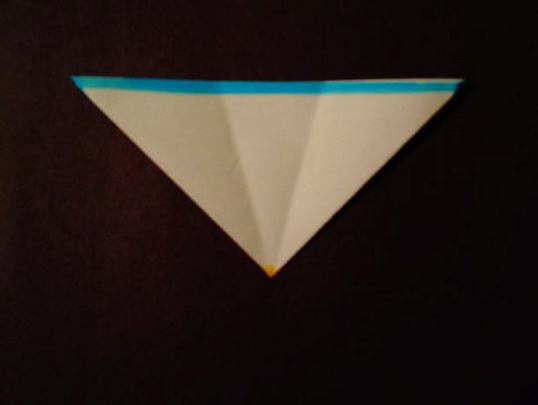
- Fold In Half Diagonally – This part is easy. Just re-fold your square using the same fold you made in step one.
- Fold In Half Again – Take your triangle and fold in half once again, creating a smaller triangle.
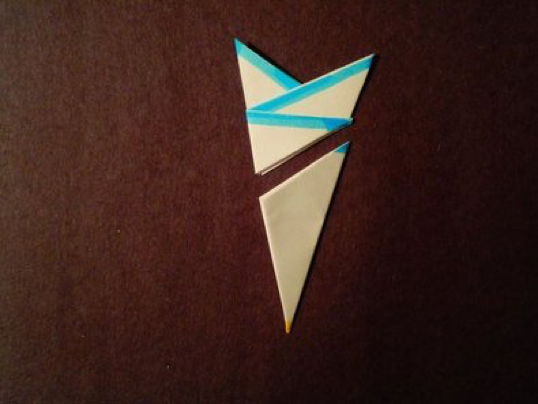
- Fold Into Thirds – This is slightly trickier. Place your triangle flat in front of you point-down, and fold it into thirds. You should have a pair of crease marks that divide the triangle into three equal sections. (If you want to make sure all of your folds are perfect, you can use a protractor to check that all three sections have a 30 degree angle)
- Fold Again – Fold the left third over the right third, lining the folds up as closely as possible to create a symmetrical final product.

- Cut The Top Off At An Angle – Flip your triangle over so that the folds are underneath and you’re looking at the back. The goal here is to make sure that all of the remaining layers are equal. You should have a straight across section at the center of the triangle, with two smaller triangles sticking up on either side. Pick a corner on one side of the straight section as your starting point, and cut on a downwards angle towards the opposite side. The end result should look something like a pointy waffle cone.
- Shape It – This is where the fun part begins. Take your scissors and snip small sections out of the edges of your triangle. Feel free to get a little creative with your shapes, taking care to leave the center of the triangle intact so that it won’t fall to pieces when you unfold it.
- Unfold – Gently unfold the triangle, and admire your handiwork. You can now display your snowflake. If you want your snowflake to lie perfectly flat, press it between the pages of a heavy book until it straightens out. Then, simply tape your snowflake to a window, wall, desk, or anywhere else that could use a little holiday cheer. You could also gently poke a hole in the top of your snowflake with a pushpin, or use a paperclip as a hook to hang your snowflake from the ceiling with a bit of string.
You’re all set! Make as many snowflakes as you please, and display them proudly. Try different cuts in each one to make every paper snowflake as unique as the real thing.
The images above were borrowed from this wonderful tutorial.
Author: Aaron White, Date: 9th December 2016
Leave The IT Dirty Work To Us And Focus Back On What's Important, Running Your Business To Maximum Potential
Contact
Fill in the form below to get started.
eSOZO Computer and Network Services keeps your business information secured. We will NEVER sell or rent your personal information to anyone.
Follow eSOZO on Social Media